Useful Tools and Gadgets: Electrical Testing

| Last modified 2009 NOV 30 21:30:13 GMT |
It is inevitable: eventually, the Scions of Lucas will rear their head and cause an electrical failure someplace in your precious Jaguar. In fact, there are many things that could go wrong that have nothing to do with Lucas.
Being equipped with a full complement of test tools and specialty leads can help. Excepting the metres themselves, virtually everything on this list was built from parts easily available at your local electronics store.
For reference, good DMMs (Digital Multi-Metres) will sport a 10Mohm or greater input impedance.
|
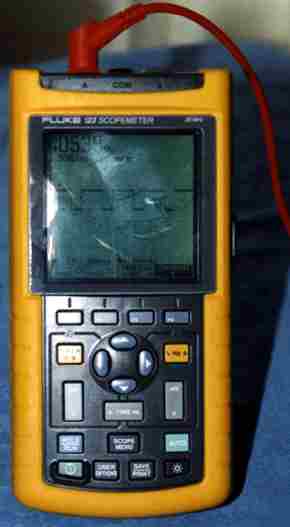
My Fluke 123 scopemetre (with a bit much reflection on the display panel from the flash reflecting off of some finger smudges - excepting the flash, it is quite readable in person). This single tool measures a variety of signals, and excepting it's price (around US$1000, including basic leads, but not including a variety of add-ons you're sure to want like an ammetre clip, thermocouple (including an infrared non-contact model, which is really sweet), carbon monoxide probe, digital pressure/vacuum module, high voltage trigger, and the software plus optical data cable for connecting it to a PC), I wouldn't hesitate to recommend it to anyone looking for a good tool to exorcise the Lucas demons or check ignition and all manner of things electrical. This isn't the proper tool to cart around in the boot for checking things on the roadside when Lucas invades your peace, but this is most definatley the tool to have around when you're in the garage. As I test and fix things, I am collecting up the waveform data for various components (you'll be seeing more posts on this site presenting waveforms), which can be very useful in diagnosing certain failures. |

|
A few years ago, I picked up a Sun Sleuth One (SUN-101) diagnostic unit. This is one of those big rollabout cabinets you'd see in an auto repair shop or smog testing shop. I acquired a smog testing unit with it, but that was so old that it booted from a special cassette tape, so I gate it the heave. The Sleuth One has a scope and two LED numeric display sections. There are several leads. TIMING (which runs to a timing strobe light with an advance/retard dial). AMPS/ALT which runs to a green aligator clip which you connect to the alternator. VOLTS/OHMS which is a red zip cord that runs to a pair of black + red aligator clips, either to test for resistance, or to simply clip to the battery or any other power point you want to measure. PATTERN, which is a blue coaxial cable which has black + red aligator clips on it, plus a thread-on connector to which you can connect an indictive clamp, or a number of other clamps (I have about four types in the tray), including one that snaps on top of HEI amplifier units. And lastly, TRIGGER, which is a red coaxial lead which has the same threaded connector and accepts the same mix of attachments which the PATTERN cable does. The igntion pickup clips on this are very nice, and at some point, I'll make it a priority to pick up the mating cable-end connectors for them so that I can fashion cable leads to use them on my Fluke scopemeter. On the front of the unit, there is a dial to select the number of cylinders (2, 3, 4, 5, 6, 8, and 12 - that last one being wonderful to me since I have two V-12 engined automobiles and have always had to set engline tools to 6 cylinders and double or halve the resulting reading), a series of buttons to control what is displayed on the DMM portion (RPM, DIST VOLTS, DC VOLTS, OHMS, POWER BALANCE, DWELL DEGREES, DWELL PERCENT, AMPS, MAGNETIC TIMING), and a button to toggle 2 vs. 4 cycle operation (though I've yet to personally run into a multi cylinder 2-stroke for anything I use - even my two gas weed whackers are 4-stroke). There are additional toggles beneath the scope display, where the ignition spark signal is displayed, and a series of adjustment dials alongside the display. |
|
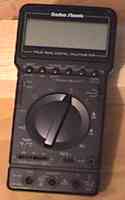
I picked this metre up probably six or seven years ago (if not more) at Radio Shack. It's a model #22-174. Believe it or not, it's been quite a good metre - and quite versatile. It included a thermocouple (so obviously has a temp setting), does diode, capacitance, and ohm testing (there's a special clip socket on the face of the metre to easily test such components without having to manually clip the test leads to bare components), frequency (Hz), transistor test (NPN/PNP with ECB auto-sense - just plug a transistor into the three prongs, and this will tell you which lead is which, what type - NPN or PNP, and the gain - it does it so well, that I loan it to an friend with electronics repair shop to ID bins of parts he gets from time to time), Volts and Amps (AC & DC), amps have 4ma, 400ma and 10A ranges, but at the 10A setting, it IS NOT FUSED. It has hold and auto/manual range selection. This has an on/off switch, separate from the function selector. This is nice, since you can hook it up, and turn it on and off without worrying about frying something as you turn the dial past other settings between OFF and what you want to measure. |

|
When I needed basic logging facilities, I picked this metre up at Radio Shack, model #22-168A (this predated my purchase of the Fluke Scopemetre). Again, this is a pretty decent metre. A slightly upscale model of it included thermocouple, which since I already had the above metre, I didn't need. Ohm, continuity, diode, HI/LO logic, hFE (transistor) testing, though not auto-typing (you need to know the pinout and whether it is PNP or NPN - this isn't nearly as nice as the above metre for transistor testing), Frequency (2kHz - 20MHz), AC/DC AMPS (200u - 20A) FUSED even at the upper range, volts to 1000VDC or 750AC, Lo/Hi capacitance. It has other features - you can set a base figure (like a voltage measurement), then get a differential, or check lowest or highest measured reading, hold a reading, etc. If you don't select any of the special features, it defaults to auto-hold, which shows the reading taken 4 seconds earlier in a corner of the display. Then, there's the fact that you can plug it into a computer (such as a laptop) to record values. The software is crap, but serves it's function sufficiently. The measurement interval is nothing compared to the ScopeMetre, but as long as you're not trying to catch events that last for only an ms or two, this should do an easy job of it. Additionally, the data can be exported for use elsewhere (nothing comes to mind for what in automotive testing you might want to do this for, but hey, who knows). This is the metre which I usually keep in the boot. Radio Shack has more current offerings similar to this that sell for about US$60. Occasionally, I've seen lesser capable (but still most everything you need for a good automotive tester) on sale for about US$40. |
|
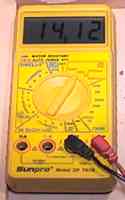
This is a Sunpro CP 7678 automotive metre. It sports 15A DC FUSED, resistance, diode check, 200m-200 DCV, LO and HI tach (4, 5, 6, and 8 cyl - a V12 would be 1/2 of the reading obtained from the 6 cylinder setting), plus dwell degree and duty cycle (not particularly applicable to electronic ignitions, where you don't set the dwell). It is water resistant and has auto power off. This is a decent metre, but isn't nearly as versatile as either of the above two metres because it doesn't do AC, temp, and a host of other things, nor is the current (AMPS) checking particularly sensitive (for measuring milliamp current draws). This has been in my toolkit for some time, but excepting when I need to use it as a digital tach, I rarely use it. |
|
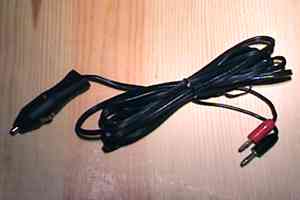
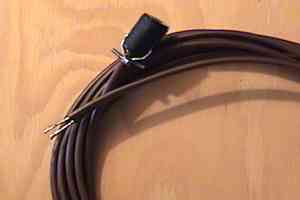
Trot off to your local electronics store, or rummage through your old car accessories pile, and locate a cigarette lighter accessory cable (if you're buying, an extension cable - one with mating cigarette lighter connectors will provide you with a socket you can use elsewhere to make a simple clamp-on cigarette lighter accessory socket for the battery). Take this, and cut it to a manageable length - 6 or 8 feet would be great. Strip the wires and solder on banana clips. The centre contact on the cigarette lighter is +V, so that should run to the RED plug. Alternatley, if you're making a lot of test cables and don't want to spend the extra dough on banana plugs (or if you have a metre which for some reason doesn't use such things), you might use insulated 0.25" spade connectors (then separatley make cables that have spade-to-whatever-your-metre uses). In fact, if it weren't for the fact that I already have mine made, in retrospect I'd have probably made it with spade connectors. This cable is useful for easily and quickly connecting a DMM right in the passenger compartment to measure charging voltage (no searching around for a suitable +V line to clip into). This is useful for determining if the "OFF CHARGE" indicator on your battery gauge is correct, or to determine what voltage the car is running at. Coupled with a logging metre (a metre with a PC interface), you could log voltages during various actions, such as starting the car, etc. Used with my Fluke Scopemetre, I can see ignition noise and fluctuations in voltage. |

|
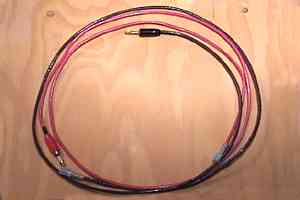
I found these connectors at one of my local autoparts stores. It's a NOBLE branded square 4-conductor caravan plug. One had three male, one female, and the other mated to that. To connect it to the TPS, you just cut off the one odd-man-out connector so that one has three male, and the other has three female. I soldered on three insulated male 0.25" spades to the male connector, and three females to the female connector. I can plug the two connectors together via the spade connectors, then plug it inline to the TPS (Throttle Position Sensor), and the system is none the wiser. I can use a tee or two (elsewhere in this document), and take measurements from the running system without screwing with trying to get a clip in on the existing plug, or using an insulation displacement probe. |
|
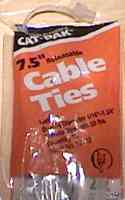
With all these wires, you need some good wireties to keep them from becoming an absolute tangled mess. Enter releaseable wireties. |

|
This is the thermocouple probe which came with the RS 22-174 metre above. It is a insertion/contact probe. Suitable for measuring the temperature of fluids. |
|
As mentioned in my Timing Light page, I modified my timing light to allow for a longer inductive lead - but also put a plug in the line to the inductive clamp, so I can unplug it from the light and use it elsewhere. This is the cable that the inductive clamp plugs into to allow me to use it with a metre. Admittedly, as shown here, the cable does not yet have any connectors on the end - I actually plan to use insulated 0.25" spade connectors when I do get around to finishing this adaptor. |

|
Take a burnt out blade fuse (this same principle will work for a glass fuse as well though), and solder a pair of wires to the test contacts at the top of it. A couple of mating insulated 0.25" spade connectors later, and you have yourself a tap suitable to insert in place of virtually any fuse in your automobile. With this, you can measure EXACTLY how much current any individual fused circuit is drawing without any fuss (conversely, with the battery cutoff described on the Battery Tools page, you could measure how much current is being drawn overall, then pull a fuse and do the math to figure out how much the consumption dropped as a result - however, when the engine is running, the battery cutoff method isn't viable - both due to the larger currents likely to be being drawn, and also because the charging system should be feeding current to the battery). |
|
This is basically the adapter which allows me to connect to any of a number of wires I've made which use spade connectors (considerably less expensive than banana plugs). The banana plugs connect to the metre, and the spades plug into whatever cable I'm using that was made with spades. |
|
Aligator clips at one end, spade connectors at the other - typically used to connect to another cable and perform grounding exercises. Note that with the banana-type aligator clips, and the above cable, this is a redundant cable, but I have it anyway. |

|
Rather than bore you with countless other cables I have, let me show you a nifty gizmo that allows you to take a test lead (banana clips for the meter) and make it pull double-duty as a jumper cable: the banana-to-aligator-clip. I have a few cables which have aligator or battery-size clips at one end, and banana plugs at the other. Stuff one of these on the banana clip, and instead of using it as a meter probe, it's now a jumper cable. |

|
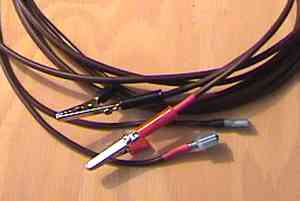
Obtained from a Jag-Lovers lister who works for an aftermarket ignition systems manufacturer, these plugs are quite useful. I have another set (uhm, temporarily displaced), which have mating insulated 0.25" spade connectors on them, which I can use with a tee line to take inline measurements, or plug directly into a spade-to-banana connector to connect to a multimetre to take measurements of the air or coolant temp sensors. |
|
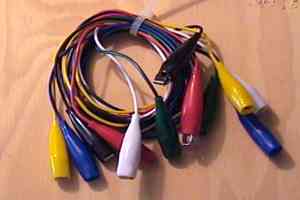
A variety of colour matched jumper clips can come in handy every now and again. I actually picked these up because I was considering taking aligator clips and colour-matching boots and using them for other cabling projects. |

|
Mating spade connectors at either end, and a heavy duty inline switch in the middle - this allows you to switch a signal you've tapped into. Originally, I made it for putting inline to my current testing lamp - then I could click the switch rather than disconnecting the plugs. This can also be used to interrupt or introduce ground or voltage to a relay - it is much easier to set it up and then click a switch than it is to fiddle with wires while you're trying to do whatever it is that is necessary to trigger the event you're monitoring. |
![[TOP]](/graphic/JagUpBar.gif)
Sean B. Straw
EMail to: Sean.Straw+Jaguar@mail.professional.org